Common Landscaping Mistakes Homeowners Make

Oahu Landscaping Services

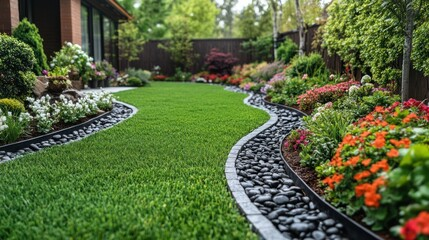
Having well-groomed landscaping can increase the overall look and feel of your property. However, it is important to avoid making common mistakes that can throw off the entire project.

It’s tempting to pack in plants or put them too close together, not realizing how much they will grow. Always plan for the future and give your landscape room to expand without blocking views or crowding walkways. Contact Oahu Landscaping Services for more details.

Not Taking Care of Your Plants

A beautiful landscape needs regular maintenance, including pruning and watering. However, many homeowners jump into landscaping without a plan and find themselves overwhelmed by the upkeep. We recommend that you take the time to research plants before purchasing, and then design with their needs in mind. For example, shrubs that need to be pruned regularly can be grouped together in accessible areas of your yard rather than spread out throughout your landscape. Also, choose perennials and ornamental grasses that offer year-round color to reduce the amount of work you need to do in your yard.

Another common mistake that leads to overgrown gardens is planting too deep. Overly deep plantings can suffocate the roots of your new flowers or plants, causing them to grow weakly and eventually die. To avoid this, always check the recommended planting depth for each plant and follow it.

In addition to planting too deep, we often see homeowners planting too close to their home or walkways. This causes the plants to eventually overtake the space and block windows or walkways. To avoid this, we recommend that you look up the mature height and width of each plant before purchasing it and then draw a rough plan for where each one will go to make sure they will fit into your landscape when they are fully grown.

We also see homeowners overlooking the different seasons when designing their yards. By focusing only on spring and summer blooms, they end up with a yard that is bare or unattractive in fall and winter. To keep your yard looking great all year, add evergreen shrubs to your design and use colorful accent plants like dogwoods and oakleaf hydrangeas to bring in fall and winter color.

Not Creating a Maintenance Plan

It is easy to get carried away with elaborate beds, new plants and other features that will make your landscape beautiful – but all of these things require regular care. When you don’t have a plan in place, your landscaping can quickly become a never-ending to-do list that you don’t have time for. To avoid this mistake, create a maintenance plan before you start planting. This will help you figure out what needs to be done on a weekly, monthly or quarterly basis to keep your garden looking its best.

Another mistake that many people make is not considering how their landscape will look in different seasons. When planning out your landscape, be sure to include plants that thrive in each season. This will ensure that your garden looks great all year round!

You also want to be sure that you are using plants that can grow in your specific climate and soil type. Not doing so can lead to a landscape that doesn’t thrive and can result in wasted money, time and effort.

Finally, it is important to regularly prune your shrubs. This will not only keep them healthy and aesthetically pleasing, but it will also help to prevent overgrowth and weeds. Make sure to use a good pair of shears or hedge clippers to prune your shrubs and be sure to do it often!

Lastly, don’t forget to cover up unsightly spots like utility boxes, hoses and other equipment. Doing so will ensure that your landscape is always looking its best and will prevent it from becoming a cluttered mess.

Not Taking the Time to Consider Your Colors

If you don’t take your color palette into account, your landscaping can end up looking drab and uninteresting. It’s important to use a range of colors, from soft pastels to brighter hues, in order to create a more appealing and balanced look. Using a combination of colors will also help to bring out the details in your plants and create contrast.

Another mistake that many homeowners make is not taking into account how their landscape will look from different angles. It’s important to think about how your garden looks from the front, back, and sides in order to ensure that it is appealing from all areas. For example, if you have an ugly planter that is visible from the road, it might be a good idea to cover it up with some attractive trellis work or flower boxes.

Not using enough focal points in your garden can also be a big mistake. Focal points add visual interest to your garden by drawing attention to certain areas. Adding eye-catching plants, unique shapes, and even statues and bird baths can be a great way to create a focal point in your garden.

Another common mistake is not using enough evergreens in your garden. Evergreens give your yard structure and color throughout the year, which can be a real boost to your curb appeal. If you don’t use enough evergreens, your garden can start to look bare and “naked” in the winter.

Landscaping is an art, and it takes a lot of time and planning to get it right. By avoiding these common mistakes, you can ensure that your yard is healthy and beautiful all year round!

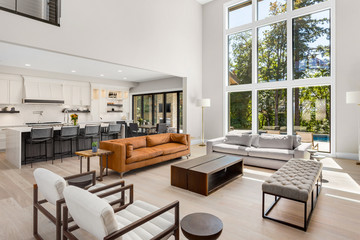
Not Choosing the Right Furniture

Not taking the time to choose the right furniture for your landscape can make a big difference in how your yard looks. You want to ensure that the furniture you choose is a good fit both size-wise and color-wise. In addition, you’ll also want to consider things like maintenance and weather resistance.

Another mistake homeowners often make is picking the wrong fence for their landscape. This can lead to problems because your fence may not match the rest of your design or it might be in the way when you’re working on other areas of your garden.

It’s also important to keep in mind that your fence should be wildlife-proof as well. This means making sure that it’s not close to any plants that wildlife would be attracted to and that it’s not blocking any entrances to your house or shed.

Lastly, it’s important to regularly prune your shrubs. This helps them stay healthy and looking their best, and it can also add a nice design element to your landscape. If you don’t prune your shrubs, they can look unkempt and unattractive.

Finally, remember to always recycle any organic and inorganic materials that you use for your landscaping. This helps to save money and reduce waste in the environment.

Not Lighting Up Your Yard

A well-lit yard is a key component to a great landscape design. Without it, your yard can look dark and uninviting after the sun goes down. Moreover, it can also be dangerous to walk in after dark, making your property less safe for you and your family.

Another common landscaping mistake is forgetting to put in eye-catching focal points. Focal points are a great way to draw attention to specific areas of your yard, but they can also help your garden look more visually interesting and balanced.

In addition, it’s important to avoid overusing lawn chemicals. While they may seem like a quick and easy solution to pesky weeds or insect infestations, these chemicals can be very harmful to your lawn and the environment. It’s best to invest in a quality lawn care program instead.

Finally, it’s important to keep in mind that a landscape is meant to be enjoyed year-round. Many homeowners focus on planting spring and summer blooms, but forget that their landscape will be visible in the fall and winter as well. To make your yard more attractive throughout the year, consider adding some evergreen shrubs and ornamental grasses to provide texture and interest in the winter. Also, add some plants with staggered bloom times to ensure that your yard has something in flower at all seasons.

By avoiding these common mistakes, you can ensure that your landscaping project will be a success. So, whether you’re planning on giving your home a makeover or are just starting out, be sure to take these tips into consideration! With a little bit of planning, you can create a landscape that will not only be beautiful but will last for years to come.

Posted in Landscaping | Tagged , , , , | Comments Off on Common Landscaping Mistakes Homeowners Make

How to Fix Minor Cabinet Damages Before Refinishing

Wood cabinets add beauty and value to a home, but they can sustain damage over time. Identifying and addressing these issues before refinishing can preserve their beauty and function. For superficial scratches, a furniture touch-up marker that matches the cabinet’s color can conceal them. Deeper dents and gouges may require more extensive repair methods.

Cabinets

Cabinet Refinishing Modesto is a significant investment in your home, and a smooth surface elevates both the look and durability of your new finish. Taking the time to repair scratches, dents, and gouges before beginning your project prevents these imperfections from showing through and compromising your final results. While attempting to touch-up paint cabinets yourself is possible, it’s often best left to the professionals to ensure consistent results. Here are some of our favorite techniques for repairing small blemishes on wood cabinets prior to refinishing or painting.

Light scratches and nicks are easy to repair with a little patience and the right tools. The first step is assessing the severity of the scratch to determine how deep it is and if it goes beyond the outer layer of wood. If it does, you’ll need a more extensive repair method.

If the scratch is shallow and doesn’t affect the finished surface, you can use a wax crayon or marker that closely matches your cabinet color to fill in the damaged area. Gently rub the mark into place, blending it with the surrounding wood and avoiding over-applying product.

Another way to conceal light scratches on wood cabinetry is by applying a clear varnish. Varnishing preserves the natural beauty of wood and protects it from moisture damage. Apply a thin coat with a brush, and allow it to dry completely before using the cabinets. Adding a second coat will build up the material for additional protection and added shine.

For deeper dings and dents, a wooden putty or filler that matches the cabinet’s color can be used to fill the damaged area. Once the putty dries, it can be sanded and buffed to be flush with the existing cabinet surface. The refinished area can then be stained and sealed as needed for your desired look.

Other common kitchen cabinet repairs include replacing worn hardware and liners for drawers and shelves. New handles, knobs, and hinges can instantly refresh the appearance of your cabinetry and replace outdated or worn pieces. Liners keep items from sliding around and scuffing the cabinet interiors, and they can be cut to size for accurate installation. Finally, installing soft-close hinges helps ease the cabinet doors into place and prevent squeaky or loose hinges.

Repairing Dents and Gouges

Small blemishes on cabinets can detract from the overall look of your kitchen. While a fresh coat of paint can cover up these imperfections, there are some stains and scratches that require a little more work. Using the right techniques and materials for cabinet repair will help you achieve a smooth finish. It’s important to thoroughly clean the cabinets before starting any repairs. This will eliminate any dirt or grease that could interfere with the adhesion of the repair material and new paint. Once the cleaning process is complete, it’s time to prime the cabinets. A high-quality primer will ensure that the new paint clings to the surface and helps to hide any existing marks.

The type of damage will determine the best approach to repairing it. For instance, light scratches only affect the surface and may only need a touch-up, while deeper gouges might need to be filled in with wood filler. Sanding plays a key role in both cases, as it allows the repaired area to blend seamlessly with the rest of the cabinet’s surface. It’s important to use sandpaper with a range of grits, beginning with a coarser option and moving to a finer grit once the blemish is smoothed out.

For deeper dents and gouges, wood putty or filler that matches the cabinet’s color is used to fill the damaged area. Once the putty is dry, it’s sanded to be flush with the cabinet’s surface before being refinished as normal. Once the refinishing is complete, the repair will be nearly invisible and the cabinets will look like new.

If your cabinets are looking a bit dull, a coat of clear varnish can revive their shine and protect the wood. Apply the varnish with a brush in even strokes, and then buff it gently to enhance the finish and add a protective layer. If your cabinets have squeaky or loose hinges, installing soft-close hinges can help restore them to proper functioning and give the doors a stylish upgrade.

If your cabinets are showing signs of age and need significant repairs, it’s important to weigh the costs of repairing them against the cost of replacing them. Although repairing is often more cost-effective than replacement, the expense of new cabinets may offer better value in the long run.

Refinishing or Painting

Cabinets can be painted or refinished to change the look and feel of your kitchen. When refinishing cabinets, it’s important to address any existing damage like scratches or dents. Knowing how to fix these problems ensures your new finish will be flawless and last longer.

First, you will need to prepare the cabinet surfaces to paint or refinish. This involves cleaning the surface and sanding it lightly to smooth out any rough spots. This will help the paint adhere and prevent peeling down the road. It is also recommended that you use a degreaser for this step to remove grease and steam build up from the high-traffic areas of your kitchen.

Once you’ve cleaned and sanded the cabinets, it’s time to apply primer. This is a vital step for painting cabinets because it creates a base layer that the paint will stick to. After applying the primer, you’ll need to sand again with fine grit paper. This will help create a smooth surface that will be easier to finish.

Then you can apply the desired color of paint with a foam cabinet roller and brush where needed. After the paint dries, you can replace the hardware. To keep your kitchen looking sleek and clean, I recommend using KILZ 3(r) PREMIUM Primer because it has great adhesion that helps prevent chipping or peeling in the future and is mildew resistant for moisture prone areas of your home like the kitchen.

Wood cabinets are a beautiful and timeless addition to any kitchen. Recognizing when a scratch is too deep to repair with a DIY method is important so that you can schedule professional repairs or replacements as necessary. If the damage is too severe, it could affect your cabinets’ structural integrity and lead to further issues like swelling or water damage. A professional can restore the damage and ensure that the area is seamlessly blended with the surrounding cabinets. This will save you time, money, and effort in the long run. Plus, a professional will have the tools and experience to do the job right the first time.

Replacement

Wood cabinets add beauty and value to your home, but over time they can show signs of wear and tear. Understanding how to fix minor cabinet damage can preserve their functionality and appearance. Recognizing when it’s time for a replacement can save you money and frustration.

Surface scratches and nicks can be repaired by lightly sanding the affected area and applying a touch-up marker that matches the cabinet’s color. Deeper dents and gouges require more extensive repair. A professional can use a filler that is compatible with the type of wood used in the cabinet, then sand the repaired area to be flush with the surrounding surfaces.

When it comes to refinishing or painting, using a primer specifically designed for cabinetry can create a base layer that is resistant to chipping and scratching. This will help the paint or stain last longer. If the cabinet door hinges or handles are rusty or damaged, these can be refinished or replaced as well.

Adding a new cabinet door can be an effective way to completely change the look of a kitchen without undergoing a major renovation project. A professional can help you select a new style and material that suits your taste, budget, and cooking needs. You can also personalize your new kitchen cabinets with custom hardware.

To replace cabinet doors, first clean the old ones thoroughly with a gentle degreaser or a mixture of baking soda and water to remove built-up grime. Once the surface is clean, you can install your new doors. It’s important to match the thickness of the cabinet boxes to the thickness of the new doors so they hang properly.

To update a cabinet door with a more contemporary look, consider replacing the center panel with a piece of glass. You can select from clear, frosted, or seeded glass to give your cabinets an eye-catching new look. To make the process easier, you can have a local glass shop cut the panel to size and provide you with clips to attach the new glass. You can then mount the glass to the cabinet using a jigsaw or router.

Posted in Home Improvement | Tagged , , , , , , | Comments Off on How to Fix Minor Cabinet Damages Before Refinishing

Types of Metal Railings Used in Architectural Stairways

https://www.83metalcraftboise.com/

Stair railings are an important design element that provide sturdiness and security while contributing to the overall architectural style of your space. Iron stair railings are a distinctive feature in both traditional and contemporary spaces.

Stainless steel, aluminum, and wrought iron are durable and offer an elegant, classic look. However, they require routine maintenance to avoid rust. Visit https://www.83metalcraftboise.com/ for more information.

Stainless Steel

Metal railings occupy an important safety role on staircases and balconies, but they also add visual interest. They can complement minimalist designs or create a traditional old-world aesthetic, and they are well-suited for homes with children or elderly residents. Stainless steel is the most durable of these metal options, and it offers the highest level of strength and corrosion resistance.

Unlike iron or aluminum, stainless steel does not rust, and it resists corrosion even in humid or coastal environments. Stainless steel is also light, strong, and easily shaped, making it an excellent choice for stairs that need to withstand frequent use or heavy weight. Stainless steel is more expensive than other metals upfront, but its durability and low maintenance costs reduce the long-term cost of ownership.

The chromium in stainless steel forms an invisible passive layer at the surface, and this enables the metal to resist corrosion. The thickness of this layer varies by alloy, with grades like 304 and 316 providing the best combination of strength and resistance to corrosion in varied climates.

Inline Design and Artec explain that a passivation treatment — in which a solution based on nitric or citric acid is applied to the surface of the steel for 20 to 30 minutes, followed by thorough rinsing and drying — can dramatically improve corrosion resistance. This process is advisable every one to two years in mild climates, but it may be necessary more frequently in salty or industrial environments.

Stainless steel works well in all environments, and it offers design flexibility for a variety of styles. Demose and Kavi Fencing point out that the metal’s sleek, linear appearance fits with modern architectural themes. However, they also note that stainless railings can be curved or ornamented to match more classical architectural themes and styles.

Stainless steel’s versatility rewards careful planning. By matching the grade, mounting method, and infill to each environment, homeowners can design a cohesive system that looks good in the living room, holds up on the deck in winter, and meets building codes and Occupational Safety and Health standards for stairs and balconies.

Aluminum

A popular choice for commercial designs, aluminum railings are strong, durable, and easy to install. They’re available in a wide variety of styles and colors, so you can choose the perfect finish to match your space. They’re also modular, making it easier to add or replace components as needed. This helps speed up installation and reduce the risk of errors during on-site welding. They’re also compatible with other materials, such as glass and steel, so they can easily fit into complex architectural designs.

Aluminum is a great option for high-rises, as it’s lightweight and can be installed in tight spaces. It’s also resistant to rust and corrosion, so you don’t have to worry about stains or damage from harsh weather conditions. This makes it a safe and durable choice for outdoor staircases, as well as indoor spaces with glass walls.

The key advantage of aluminum is that it’s not as expensive as other metals. It’s also much lighter than steel, making it more convenient to handle and install. It’s also easier to maintain, as it doesn’t require regular painting or upkeep like wrought iron or wood. In fact, aluminum can last for years without any maintenance at all, saving you money in the long run.

Wrought iron has its own advantages, but it’s typically more expensive upfront than aluminum. It’s also more prone to rust if not properly maintained, so it requires a lot of upkeep and maintenance to keep it looking good.

If you’re looking for a high-quality, cost-effective metal railing for your architectural stairs, consider American Railworks, which provides custom solutions to clients throughout Bellevue and the greater Seattle area. Their in-house fabrication process ensures rigorous quality control, and they adhere to local codes and regulations. Their services include measuring, designing, and installing railings that are safe and code compliant. They offer a variety of options, including handrails, guardrails, and horizontal railings. Their designs are clean and modern, ensuring safety while enhancing the aesthetic of your architecture. They also provide a free consultation to help you determine which option is best for your space.

Wrought Iron

Stair railings are a design feature that not only provides safety, but also enhances the aesthetic and craftsmanship of any staircase. From traditional, elegant wood to the sleek lines of stainless steel, there are many styles and materials that create a stunning, safe railing that will last for years and impress visitors. Choosing the right stair railing material and style is essential to ensure safety, especially in homes with children or in public spaces. The best stair railing design should be functional, attractive and easy to maintain.

Wrought iron is a beautiful and durable material that can add a touch of elegance to any staircase. It can be forged into intricate, fanciful designs to create a classic look or welded into simple, clean lines for a modern touch. Wrought iron stair railings are a versatile addition to any home or business, and they’re also ideal for renovations of historic properties.

An outdoor wrought iron railing can be a lovely way to tie together rustic and contemporary elements in your home, garden or commercial project. It pairs well with natural wood, and it can be decorated with nature-inspired motifs to complement exposed wooden beams or other rustic architectural elements. Wrought iron can also be painted with weathered finishes to bring a timeless, old-world charm to modern landscaping projects and new construction.

When selecting a wrought iron stair railing for your project, make sure that you select the highest quality possible. Low-quality metal can rust, and it won’t hold up to the wear and tear of daily use. A good-quality wrought iron stair railing will be made from galvanized metal, and it will have a protective coating to prevent corrosion in humid or rainy regions.

Another important factor to consider is how the stair railing will be attached to the balusters. Some stair railings have integrated handrails that sit within the groove of the balusters, while others are separated by a space and mounted to the top of newel posts. Integrated handrails are not recommended in homes with children, and they may not meet local building codes that require separate guardrail-mounted handrails.

Wood

Stair railings, also known as balustrades, protect us from the danger of falling down stairs. These handrails are an important safety feature that must meet building codes and standards, as well as offer a comfortable grip to prevent injuries. Stair railings are also an architectural element that defines the aesthetic of a staircase or balcony. Choosing the right style and material is essential for meeting both safety standards and design goals. Metal railings provide the perfect balance of strength and style, adapting to a variety of architectural designs while providing unmatched durability.

Unlike wood, metal doesn’t show dents or scratches from heavy use. Iron and steel rails don’t warp in humid climates, and aluminum stands up to salt air on the coast. In addition, they don’t splinter or develop termite damage like wood. In contrast, wood stains easily, requires frequent sanding and staining for upkeep, and can become brittle with age.

The cost of wrought iron is higher than other metal options, but it is worth the investment for its long-term durability and beauty. It is a classic look that suits both traditional and modern architecture, adapting to a range of color palettes with paint or powder coatings. Wrought iron railings can be etched or carved for added detail, and they can be accented with glass, stone, or other materials to enhance the visual appeal of a staircase or balcony.

Aside from their durability and aesthetic, metal railings are budget friendly compared to wood in the long run. A simple oak rail costs twenty to thirty dollars per linear foot for materials, and labor rates at fifty dollars per hour for cutting and welding. Once you add the cost of water damage repairs, sanding, staining, extra labor hours and future upkeep, metal can outperform wood in price over a ten to twenty-year span.

Stainless steel is the most popular choice for modern staircases. Its sleek lines and metallic finish suit contemporary design, and its durable construction is ideal for high-traffic or elevated environments. Stainless steel is low maintenance, and a periodic wipe-down with mild soap keeps it looking new. It resists corrosion in humid or coastal environments, and it can be accented with protective coatings for added protection.

Posted in Metal Craft | Tagged , , , , | Comments Off on Types of Metal Railings Used in Architectural Stairways

Inspiring Home Furnishing Ideas to Elevate Your Space

The way a home is furnished has a profound impact on its atmosphere, comfort, and functionality. Thoughtful furnishing choices transform rooms from mere spaces into inviting environments that reflect personality, lifestyle, and taste. Whether you’re decorating a new house or refreshing an existing one, exploring creative home furnishing ideas can help you achieve a harmonious blend of style and practicality.

home furnishings

Creating a Cohesive Style

A good starting point for furnishing any home is establishing a consistent style or theme. Whether you’re drawn to minimalism, rustic charm, modern elegance, or eclectic mixes, having a guiding aesthetic makes decision-making easier. Consider your color palette, preferred textures, and the mood you want each room to convey.

Cohesion doesn’t mean every room has to look identical; instead, aim for subtle connections between spaces. Repeating certain materials, colors, or shapes throughout the home creates a sense of flow while still allowing for individual expression in each area.

Prioritizing Comfort and Functionality

While aesthetics are important, the true success of a furnished home lies in comfort and function. Select pieces that suit your lifestyle and the way you use each room. For example, a family with children may prioritize durable fabrics and easy-to-clean surfaces, while someone who entertains often may focus on flexible seating arrangements.

Think about the movement of people within a room and arrange furniture to support natural pathways. Adequate spacing between pieces enhances comfort and makes spaces feel open and inviting rather than cramped.

Living Room Furnishing Ideas

The living room is often the heart of the home, so it deserves careful attention. Start with foundational pieces like a sofa or sectional that anchors the space. Add complementary seating options such as armchairs or ottomans to encourage conversation and relaxation.

Layering textiles can instantly elevate a living room. Throw pillows, area rugs, and cozy blankets add texture and warmth, creating a welcoming atmosphere. Incorporating a mix of lighting—overhead fixtures, table lamps, and floor lamps—allows you to adjust the mood from bright and lively to soft and intimate.

A focal point, whether it’s a coffee table, a statement wall, or a striking piece of art, helps unify the design. Arrange furniture around this centerpiece to guide the eye and create balance.

Bedroom Furnishing Ideas

Bedrooms are personal sanctuaries, so focus on creating a restful retreat. Choose a bed frame that suits your style and pair it with comfortable, high-quality bedding. Nightstands on either side provide both symmetry and storage for everyday essentials.

Adding a bench or storage ottoman at the foot of the bed offers extra seating and a place to store linens. Soft lighting, such as bedside lamps or wall sconces, creates a calming ambiance. Incorporating a plush rug underfoot adds warmth and defines the space.

Consider adding personal touches like framed photos, artwork, or decorative objects that bring a sense of individuality to the room without overwhelming the serene atmosphere.

Dining Room Furnishing Ideas

The dining area is a space for gathering and sharing meals, so it should feel both functional and inviting. Start with a table that fits the size of the room and the number of people you typically host. Pair it with comfortable chairs that encourage lingering conversations.

For added versatility, consider extendable tables or stackable chairs to adapt to different occasions. A stylish sideboard or buffet not only adds storage for dining essentials but also serves as a platform for decorative displays.

Lighting is crucial in the dining room. A pendant light or chandelier centered over the table creates a focal point and sets the mood for meals. Complement it with softer accent lighting for a layered effect.

Multi-Purpose and Small Space Solutions

Not every home offers large, open rooms, so maximizing functionality in smaller spaces is key. Multi-purpose furniture can be a game-changer. Look for coffee tables with hidden storage, fold-out desks that double as shelving units, or sleeper sofas for guest accommodations.

Vertical storage solutions such as tall bookcases, wall-mounted shelves, and hooks help keep floors clear and make rooms feel larger. Mirrors are another clever tool; they reflect light and create the illusion of more space.

When furnishing a compact area, opt for lighter colors and streamlined furniture to maintain an airy, uncluttered look.

Bringing Nature Indoors

Incorporating natural elements into your furnishings adds warmth and a sense of tranquility. Wood finishes, rattan accents, and stone surfaces bring texture and an organic feel to interiors. Complement these materials with indoor plants, which not only enhance aesthetics but also improve air quality.

Position plants strategically—on shelves, in corners, or as centerpieces—to soften lines and create a lively, welcoming atmosphere. Even small touches like a vase of fresh flowers on a coffee table can have a refreshing effect.

Accessorizing with Purpose

Accessories complete a furnished space, but they should be chosen with intention. Too many decorative items can create clutter, while too few can leave a room feeling unfinished. Strike a balance by selecting pieces that reflect your style and serve a purpose.

Throw pillows, blankets, candles, and artwork can be swapped seasonally to keep your décor fresh without overhauling the entire room. Decorative trays, bowls, and baskets add texture while providing practical storage for everyday items.

Lighting as a Design Element

Lighting isn’t just functional; it’s also a powerful design element. Layer different types of lighting—ambient, task, and accent—to create depth and flexibility. Use floor lamps to highlight seating areas, pendant lights over dining tables, and dimmers to adjust brightness according to the mood.

The right lighting can highlight furnishings, artwork, and architectural features, making the entire space feel more dynamic and inviting.

Personalizing Your Space

The best furnishing ideas are the ones that make your home uniquely yours. Incorporate personal treasures, travel souvenirs, or handmade items into your décor. Displaying books, photos, or heirlooms creates a narrative that makes your space feel lived-in and welcoming.

Remember, there’s no single formula for a perfectly furnished home. Trust your instincts, experiment with layouts, and don’t be afraid to mix styles. Often, the most memorable interiors are those that blend practicality with a touch of individuality.

Thoughtful home furnishing goes beyond simply filling a space with furniture. It’s about creating environments that support your lifestyle, express your personality, and enhance everyday living. By focusing on cohesive style, comfort, and purposeful details, you can transform any room into a beautiful and functional haven.

Whether you’re furnishing a sprawling house or a compact apartment, these ideas can guide you toward a home that feels balanced, inviting, and uniquely yours. With the right mix of creativity and practicality, your home can become not just a place to live, but a true reflection of who you are.

Posted in Uncategorized | Comments Off on Inspiring Home Furnishing Ideas to Elevate Your Space